Sage Writer - Guide
Sage SEO's content writing editor and publishing tool
Creating Your First Article
This overview will help you get started writing your first article.
Article Title and AI Writing Tools
At the top of the page, you'll see the title of the article. You can change that by clicking into the text bar and editing. You'll also notice this icon:

This is the AI Headline Generator. It creates 10 alternative potential titles of your article by analyzing the current title along with the first 300 words of your article's main body.
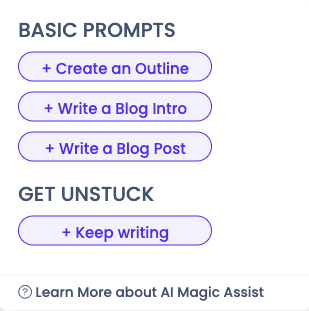
Additionally you will find the AI Magic Assist Tool in the bottom right of the editor, including this one. It looks like this before and after expanding on it:


We highly recommend you use this tool to get started and get past the "blank page" frustrating part of writing content.
You can use it to do any of the following and more:
Create an outline for your blog post
Write a blog introduction
Write an entire blog post-length article
Once you open the tool, choose an option to get started:

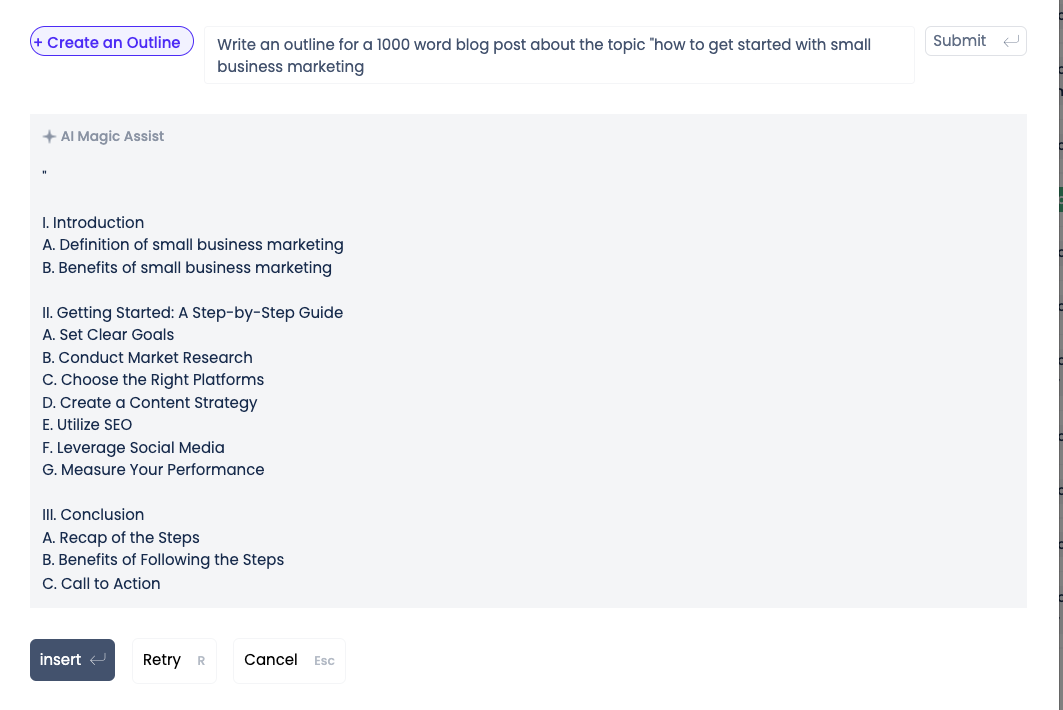
Here is a quick example of the power of this tool:

Next, let's talk about the Sage Writer interface and how to use it to edit and write the rest of your article.
Getting to know the Sage Writer interface
Below the title there is a toolbar where you can:
Mark text as a Header (H1 for the main title, H2 for your primary sections, H3 for subtitles, etc) or Paragraph (for the main body of text)
Choose a font or leave as System Font (Recommended)
Choose the size of font
Bold, Italic, Underline
Numbered lists or bullets, left/right/center justifications, add images, links, and YouTube/Loom Videos
Mark text as a block quote, show the HTML of the page, preview your article, or undo/redo your most recent action, and
Export your article to PDF.

Above this text is an image of the toolbar. If you click on this image, you can edit it - crop, resize, move around the page.
Description of Sage Writer's " Basic Prompts"
Create an Outline
The blog post outline can be quickly created using the "Create an outline" feature.
Steps to follow:
Step1: Use your login information to access " https://app.sageseo.ai "

After logging in, "Sage writer" will be visible on the left. The list of articles you have written may be seen under Sage Writer. Click "Add article" and then "Article title" again to start a new article. You can enter the "Article title name" and "Description of the title" in the description box that opens.


Step 2: You will see our "AI Magic Assist" tool at the bottom of the blank page that appears after clicking Sage Writer. Click the tool.

Step 3 " To create an outline, click the button. A box where you must type "Write a blog post outline on "your topic"" and click "Submit"

On the basis of the topic you want to write about, you will be able to see that an outline will be created.

Step4 : Click insert
Write a Blog Intro
The "Write a blog intro" feature creates a blog introduction from the outline of your post.
Step1 : Copy and paste the outline after clicking "Write a blog intro." After pasting the outline, you can add a brief text like "Write a blog post intro for the above outline" below it.

Step 2: Click "Submit"
Step 3: Click " Insert"
Write a Blog Post
Using the topic's outline and blog introduction, the "Write a Blog Post" feature generates an entire blog post.
Step 1: When you click "Write a blog post," you can copy and paste the entire outline and blog post intro that the AI magic assist created in the "Write a blog post" section, and you can also write instructions below the outline and blog post intro, such as "Write the rest of the blog post from the above outline and blog post intro."

Last updated